CC Switch (Recommended)
Point Claude Code / Codex at SoleAPI with a GUI — no config files, no environment variables; includes an API format ↔ Base URL cheat sheet.
If you're not comfortable editing config files, use the open-source desktop app CC Switch: it gives Claude Code, Codex, Gemini CLI and other AI coding tools a visual "provider" manager. Enter the base URL and key once, then switch between the official API and SoleAPI with one click — no manual configuration anywhere.
Before you start: get your API key
Sign up for SoleAPI and create a key (it looks like sk-sole-…) on the console's "API Keys" page — see the Quickstart.
The full key is shown only once at creation — copy and save it before moving on.
Step 1: Install CC Switch
- macOS: run the command below, or download the
.dmgfrom Releases.
brew install --cask cc-switch- Windows: download the MSI installer (or the portable ZIP) from Releases.
- Linux: Releases provide
.deb/.rpm/ AppImage packages. - Official download page: ccswitch.io/download (latest builds for every platform)
Step 2: Import the SoleAPI provider
One-click import
The console's API Key page has an Import to CC Switch button — in the dialog shown right after creating a key:
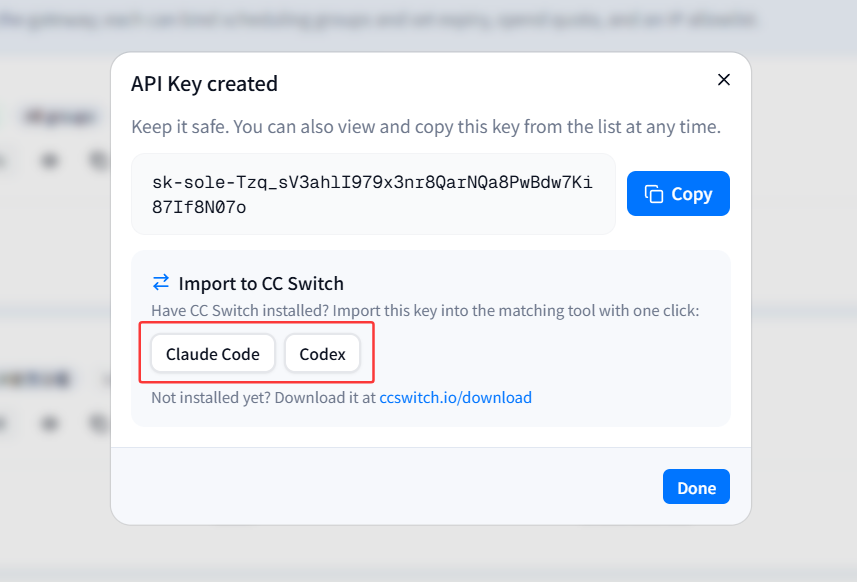
and inline on every existing key:
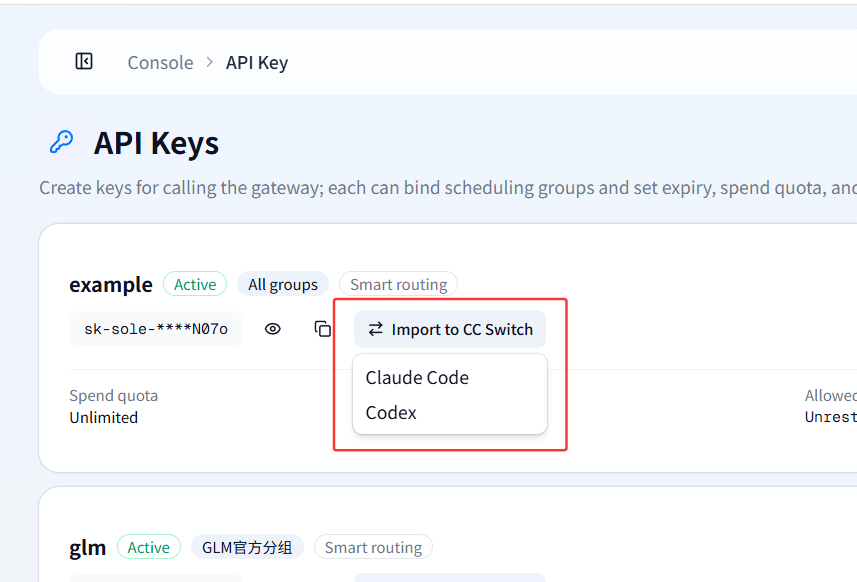
Clicking it launches your local CC Switch with a configuration preview; confirm and the provider is added with the base URL and key filled in automatically, and the API format already set for the target tool — nothing to type.
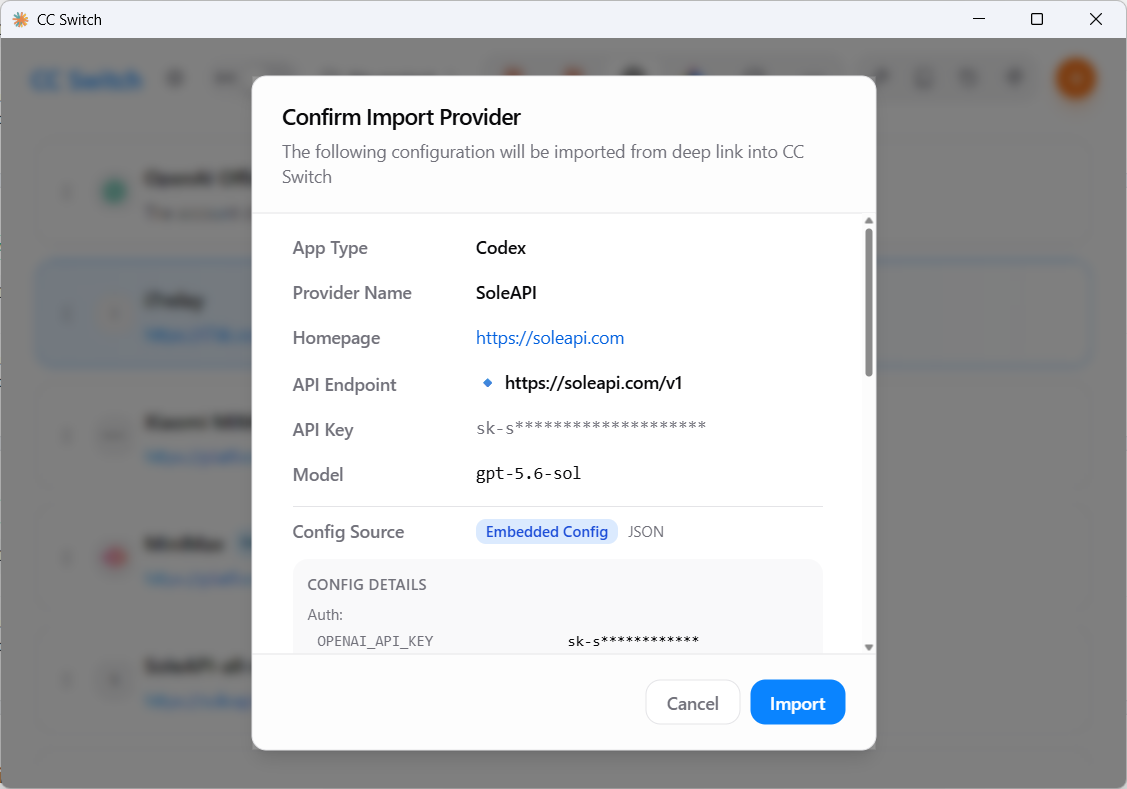
One-click import requires CC Switch v3.16 or later (with ccswitch:// deeplink support). If nothing happens on click, make sure CC Switch is installed and has been launched at least once.
Imported providers also have CC Switch usage display enabled automatically: the list shows your balance and total spend with no extra setup. To get the same for a manually added provider, see Step 4.
Add manually (fallback)
If one-click import isn't an option, fill it in by hand:
-
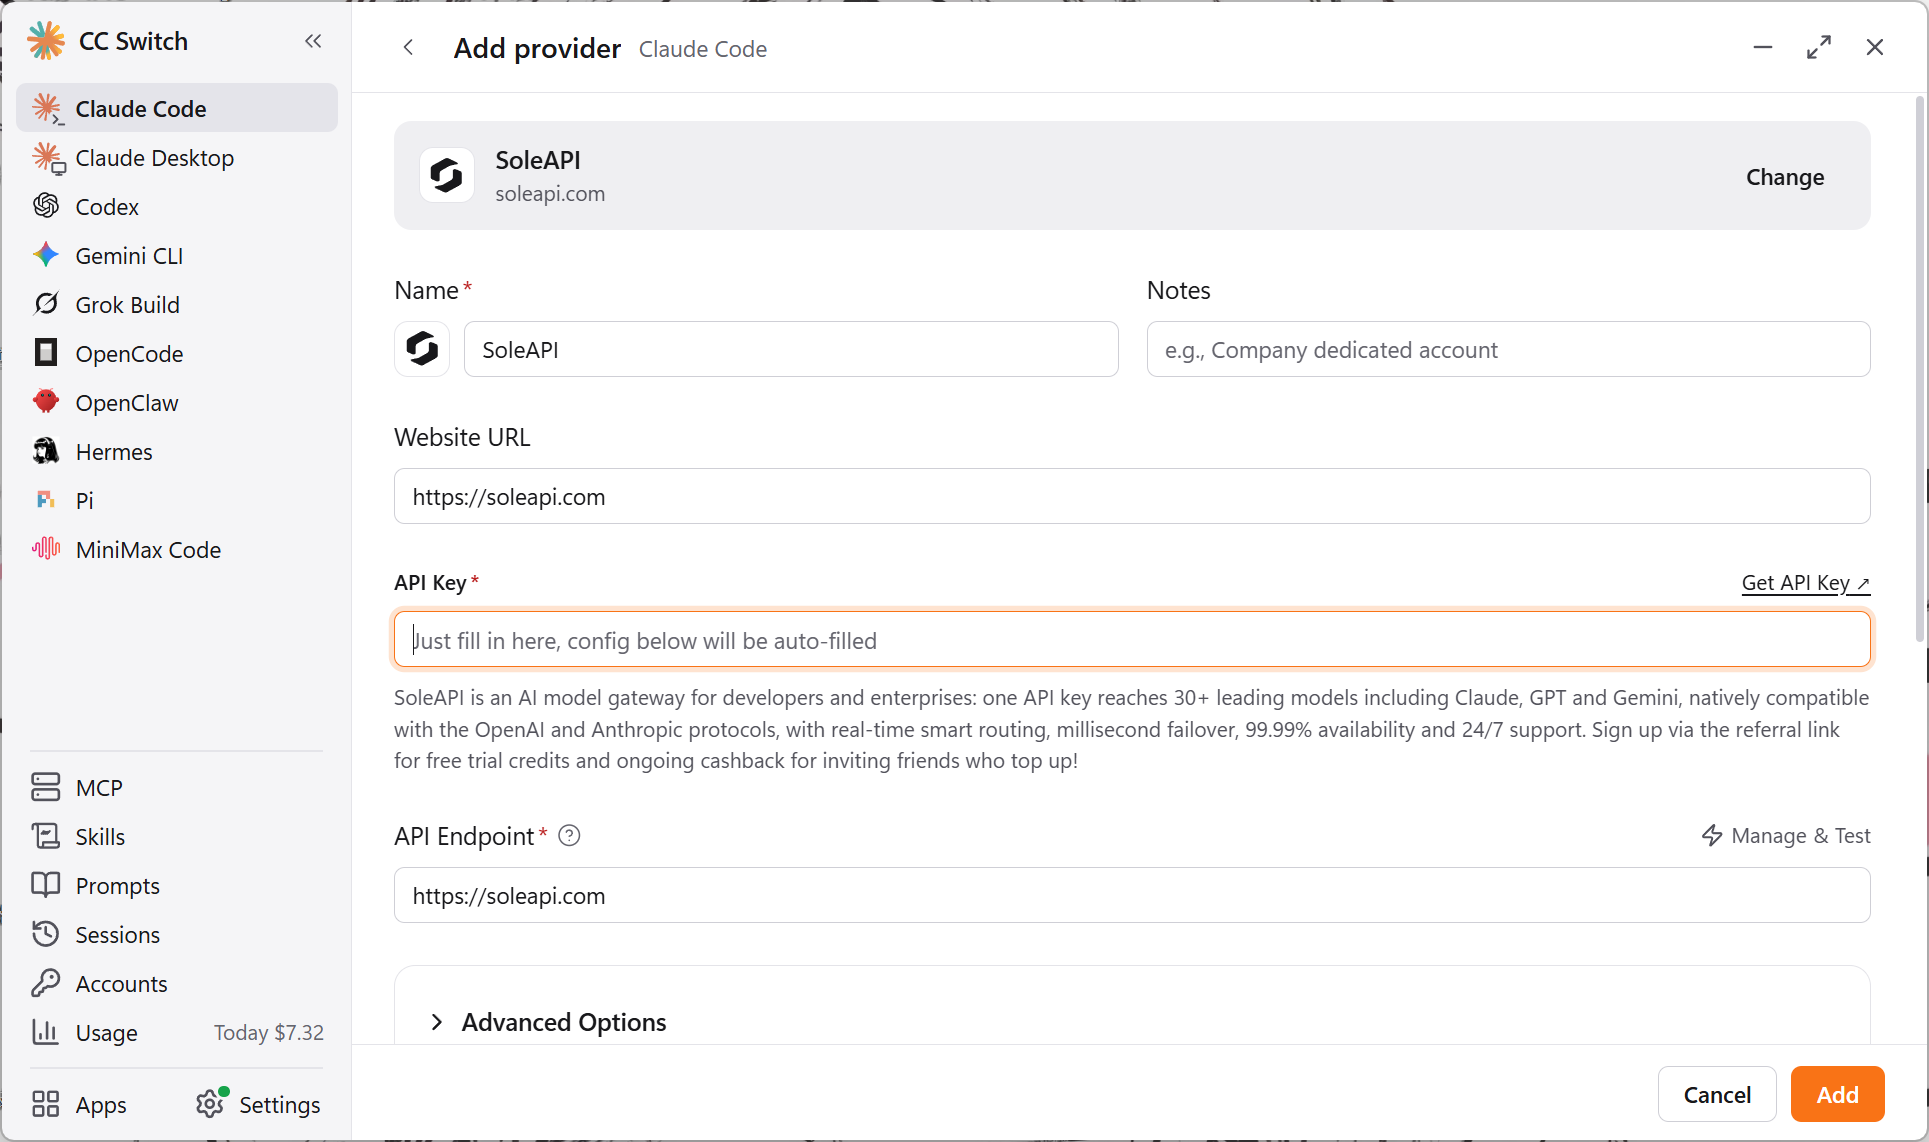
Open CC Switch and pick the tool you want to configure at the top of the home screen (e.g. Claude Code).
-
Click the plus icon in the upper-right corner ("Add Provider") to open the "Add New Provider" page.
-
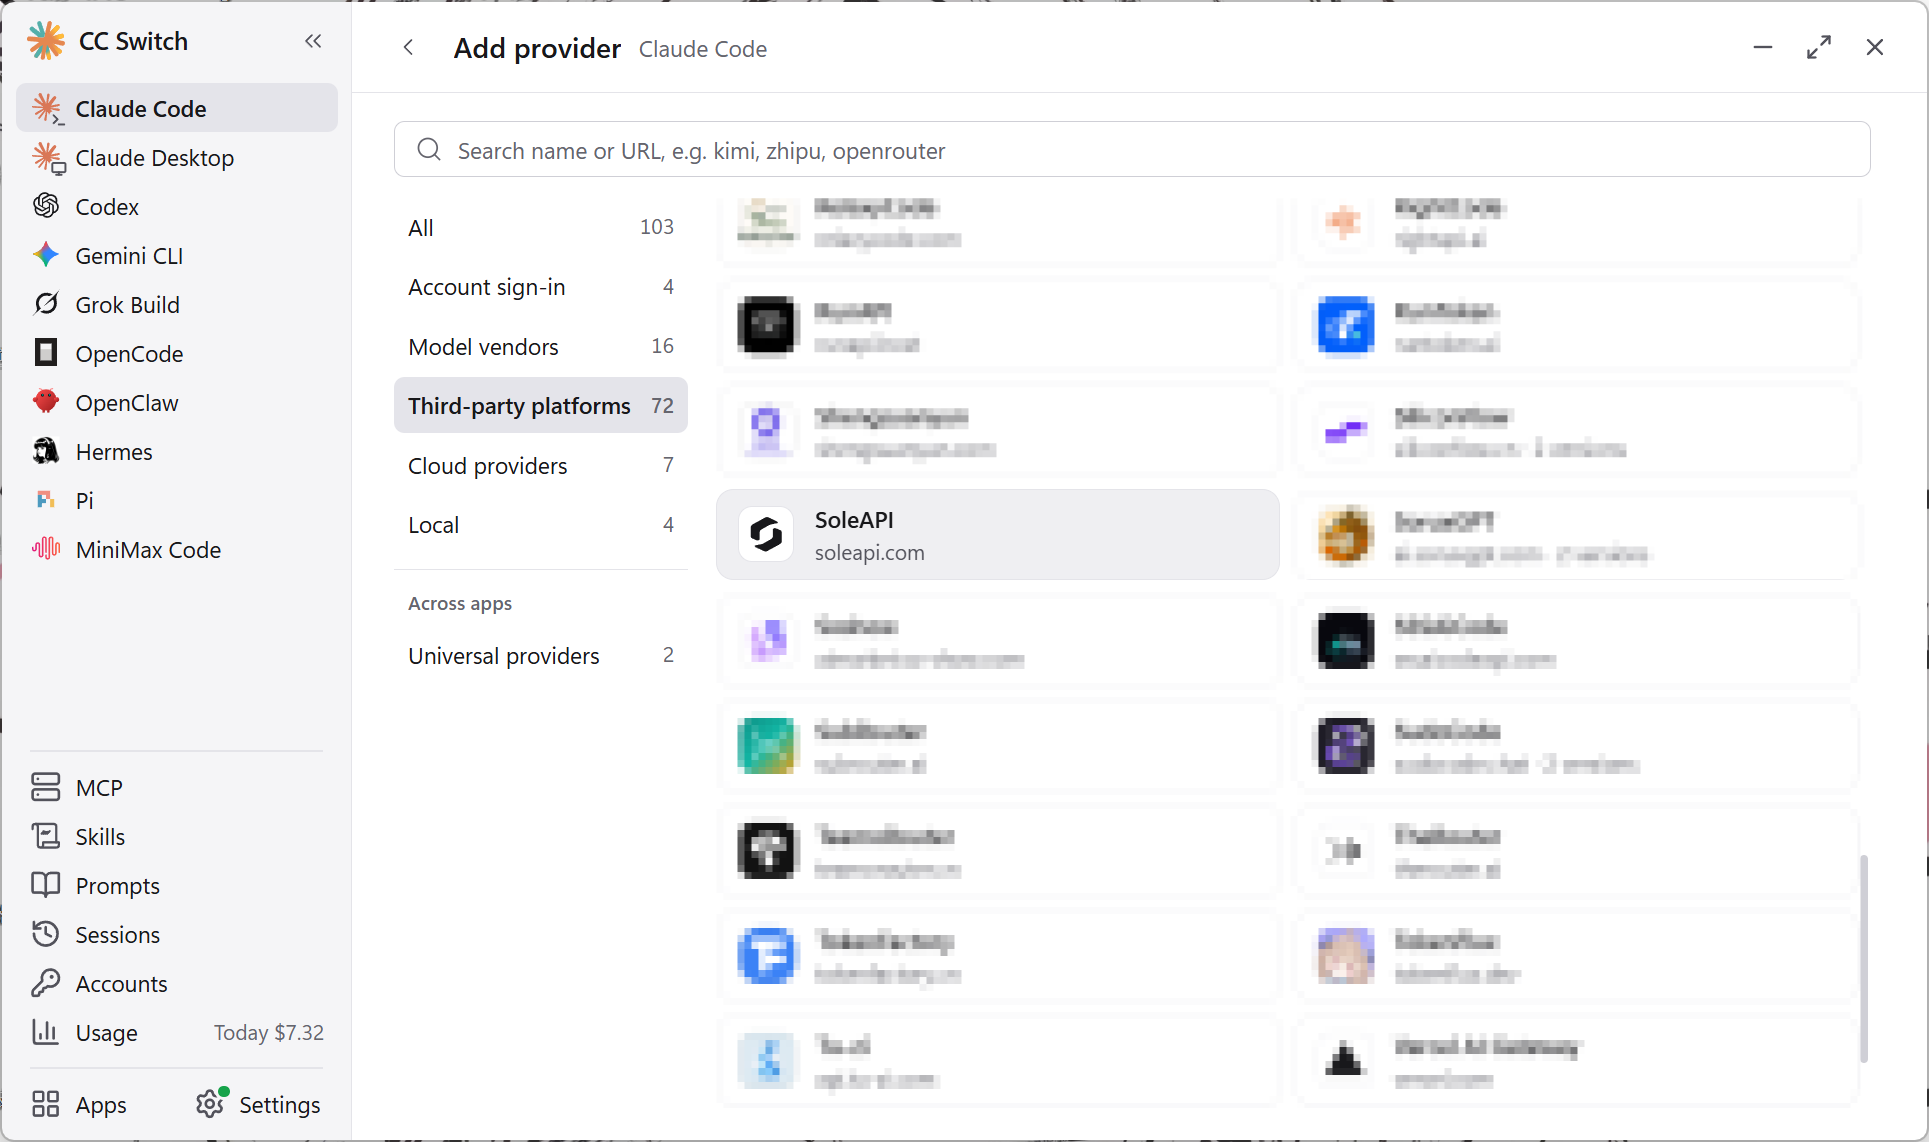
Select SoleAPI from the preset providers.
-
Enter your API Key.
-
Click Add in the lower-right corner to finish adding the provider.
CC Switch v3.20.2 or later is required because this version adds SoleAPI as a preset provider. Updating CC Switch is recommended, especially for new users; on an older version, configure the provider manually.
Step 3: Enable and verify
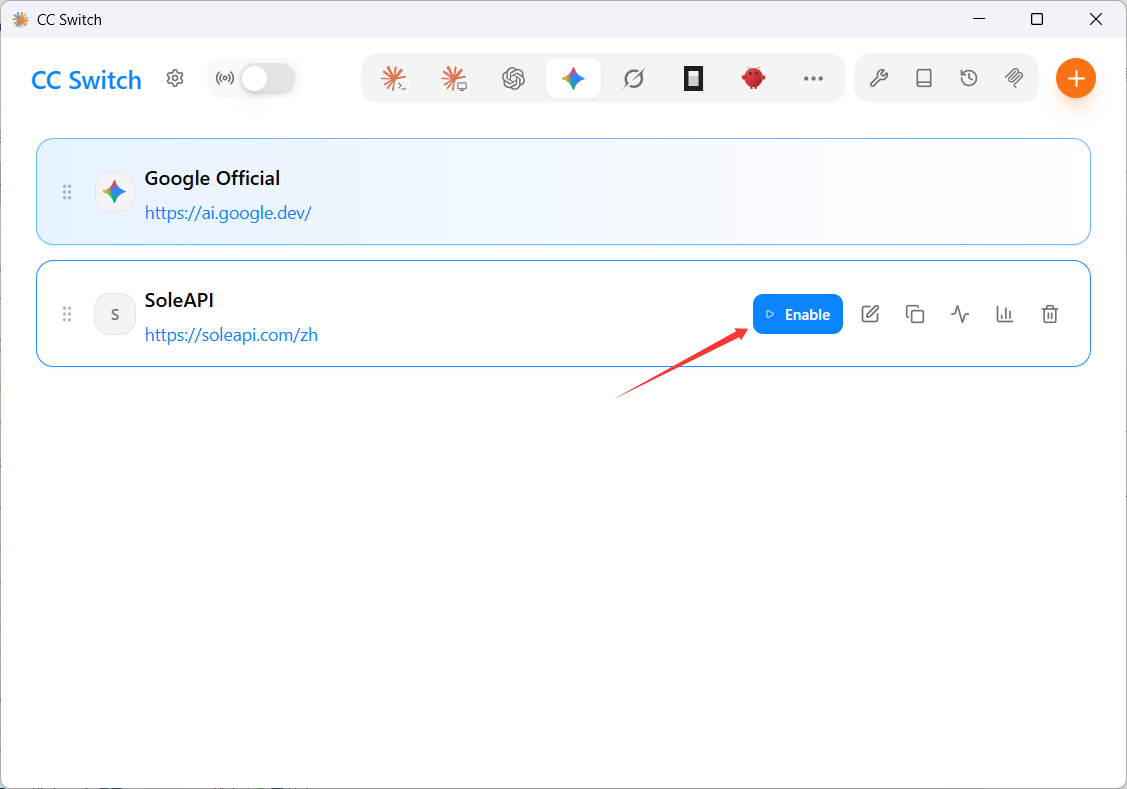
- Select the SoleAPI entry and click "Enable" — CC Switch writes the configuration into the tool's config file for you.
- Restart your terminal (or the CLI tool) so the change takes effect; Claude Code supports hot-switching and usually needs no restart.
- Open Claude Code and send any message — a normal reply means you're connected. You can also verify the key directly:
curl https://soleapi.com/v1/models \
  -H "Authorization: Bearer sk-sole-your-key"
To switch back to the official API (or any other provider) later, just click that entry in the CC Switch list or its system-tray menu — you can switch back and forth any time.
Step 4: Configure usage display (optional)
Once set up, the provider row shows "Used: xx Remaining: xx Credits" right in the list, so you don't need to open the console to check your balance. Providers added by one-click import are already configured — skip this step.
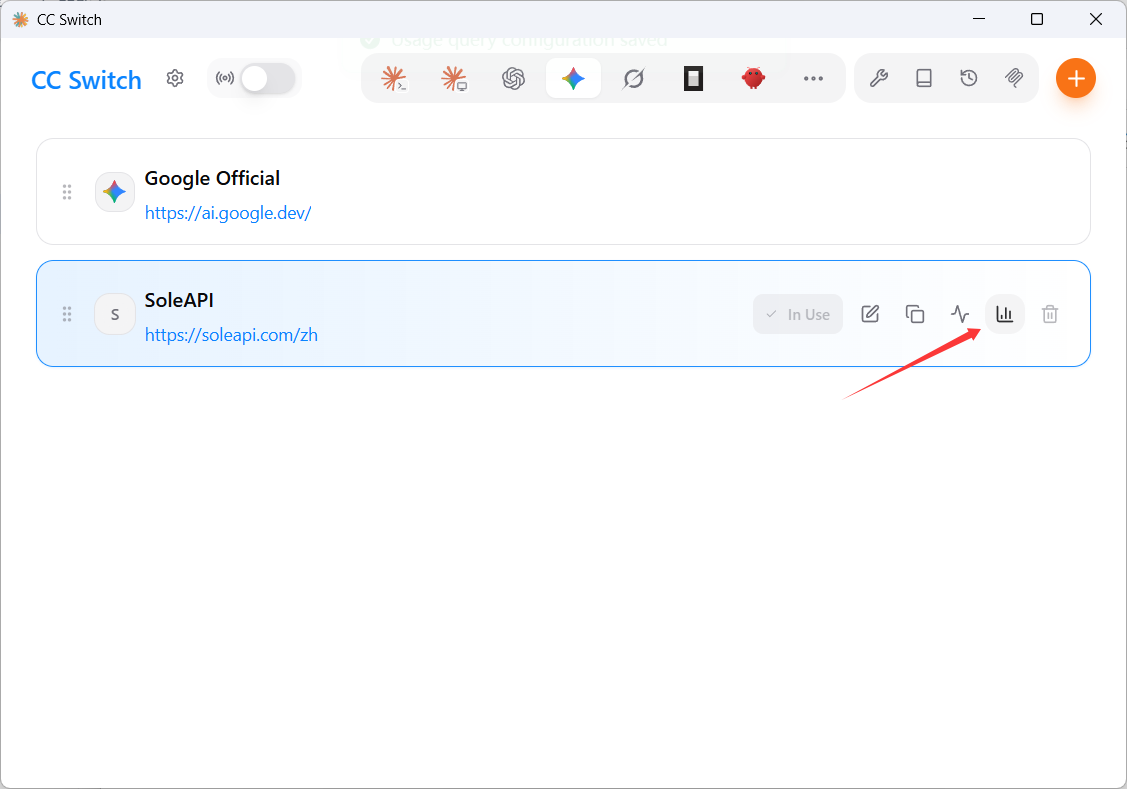
This setting only appears after the provider is saved: go back to the provider list, hover over the row, and click the icon whose tooltip reads "Configure usage query":
Finally, paste the snippet below into Extractor code:
({
  request: {
    url: "{{baseUrl}}/v1/usage",
    method: "GET",
    headers: { "Authorization": "Bearer {{apiKey}}" }
  },
  extractor: function(response) {
    return {
      remaining: response.remaining,
      used: response.used,
      total: response.total,
      unit: response.unit || "Credits"
    };
  }
})
{{baseUrl}} and {{apiKey}} are CC Switch placeholders, replaced at runtime with the "Request URL" above and the provider's key — so paste the snippet as-is; don't substitute your own URL or key.
Save and return to the list; the provider row now shows used and remaining credits:
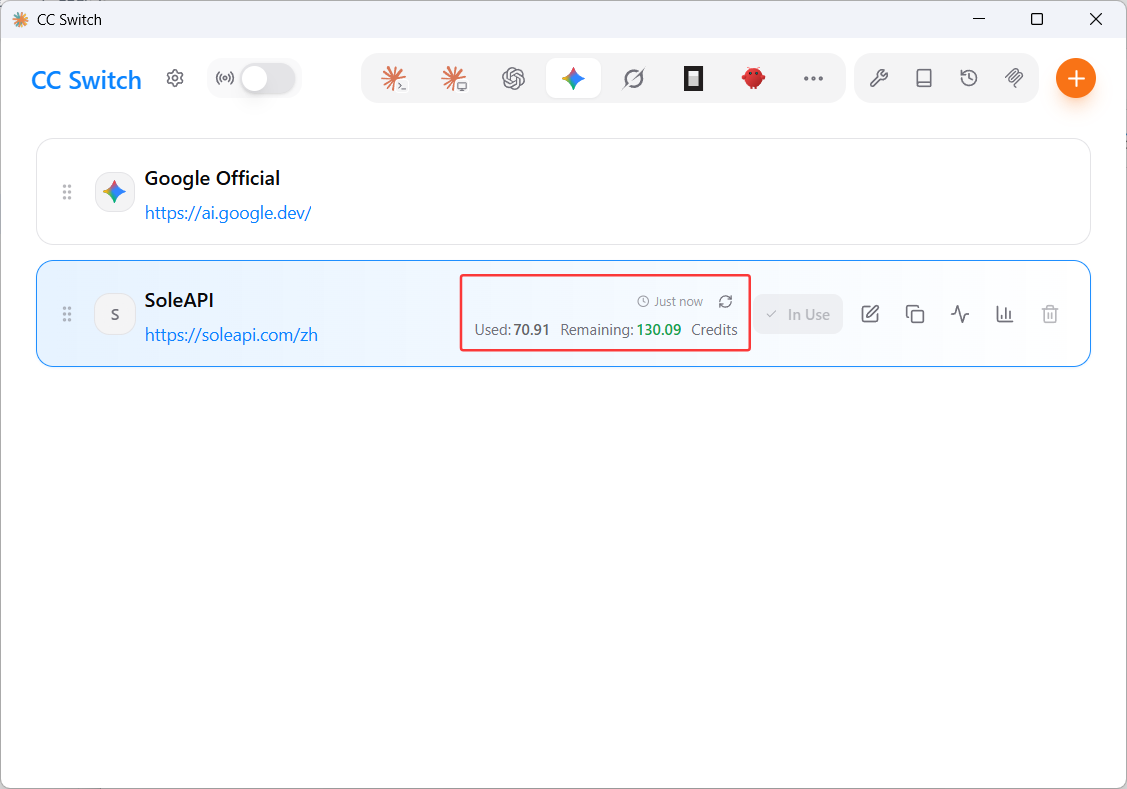
The data comes from GET https://soleapi.com/v1/usage: authenticated with your API key, it returns remaining / used / total / unit, in Credits.
Troubleshooting
- 401 errors: the key was copied incompletely or is disabled — check it in the console; see Errors for details.
- Error "No upstream can accept this endpoint protocol. Ask your administrator to add the entry format or configure a protocol adapter.": the model has no available entry under the API format you selected. Change the provider's API format from OpenAI Compatible to OpenAI Responses and enable it again. This is an entry-side limit — switching to a different agent client won't get around it.
- 404 in Anthropic format with
/v1/v1/messagesin the path: the base URL has an extra/v1; drop the version segment and keep only the bare domain. - Double slash (
//v1) in error messages: remove the trailing/from the base URL and enable again. - Switch doesn't take effect: restart the terminal and confirm the provider shows as enabled in CC Switch.
- Provider row shows no usage: confirm "Enable usage query" is on, the request URL is
https://soleapi.com(without/v1), and the extractor code was pasted in full (including the outer parentheses); with the auto-refresh interval set to0nothing refreshes automatically — trigger it manually. - Nothing happens when clicking "Import to CC Switch": CC Switch isn't installed, is older than v3.16, or has never been launched (so the protocol isn't registered); install/launch it and click again.
CC Switch is a third-party open-source tool, unaffiliated with SoleAPI. Prefer not to install a desktop app? Manual setup is just as simple — see the Quickstart.